
oUR WINDOW INSTALL pROCESS
After our initial onsite measure and consultation, we hope the following accessible information will help you continue to understand our process which include but is not limited to the following:
1. Demo existing windows
2. Install with or without nail fins
3. Add flashing (vinyl tape) around the window
4. Install trims over the flashing
5. Painting of exterior trims and up to 2 inches of siding abutting the trims is at an extra cost, and will be recommended specifically for Customers with windows located on the 2nd floor; we can do this service while our scaffolding is still erected. See notes contained in "Exterior Finish" photo regarding the "reveal".
6. Caulking is added throughout our install.
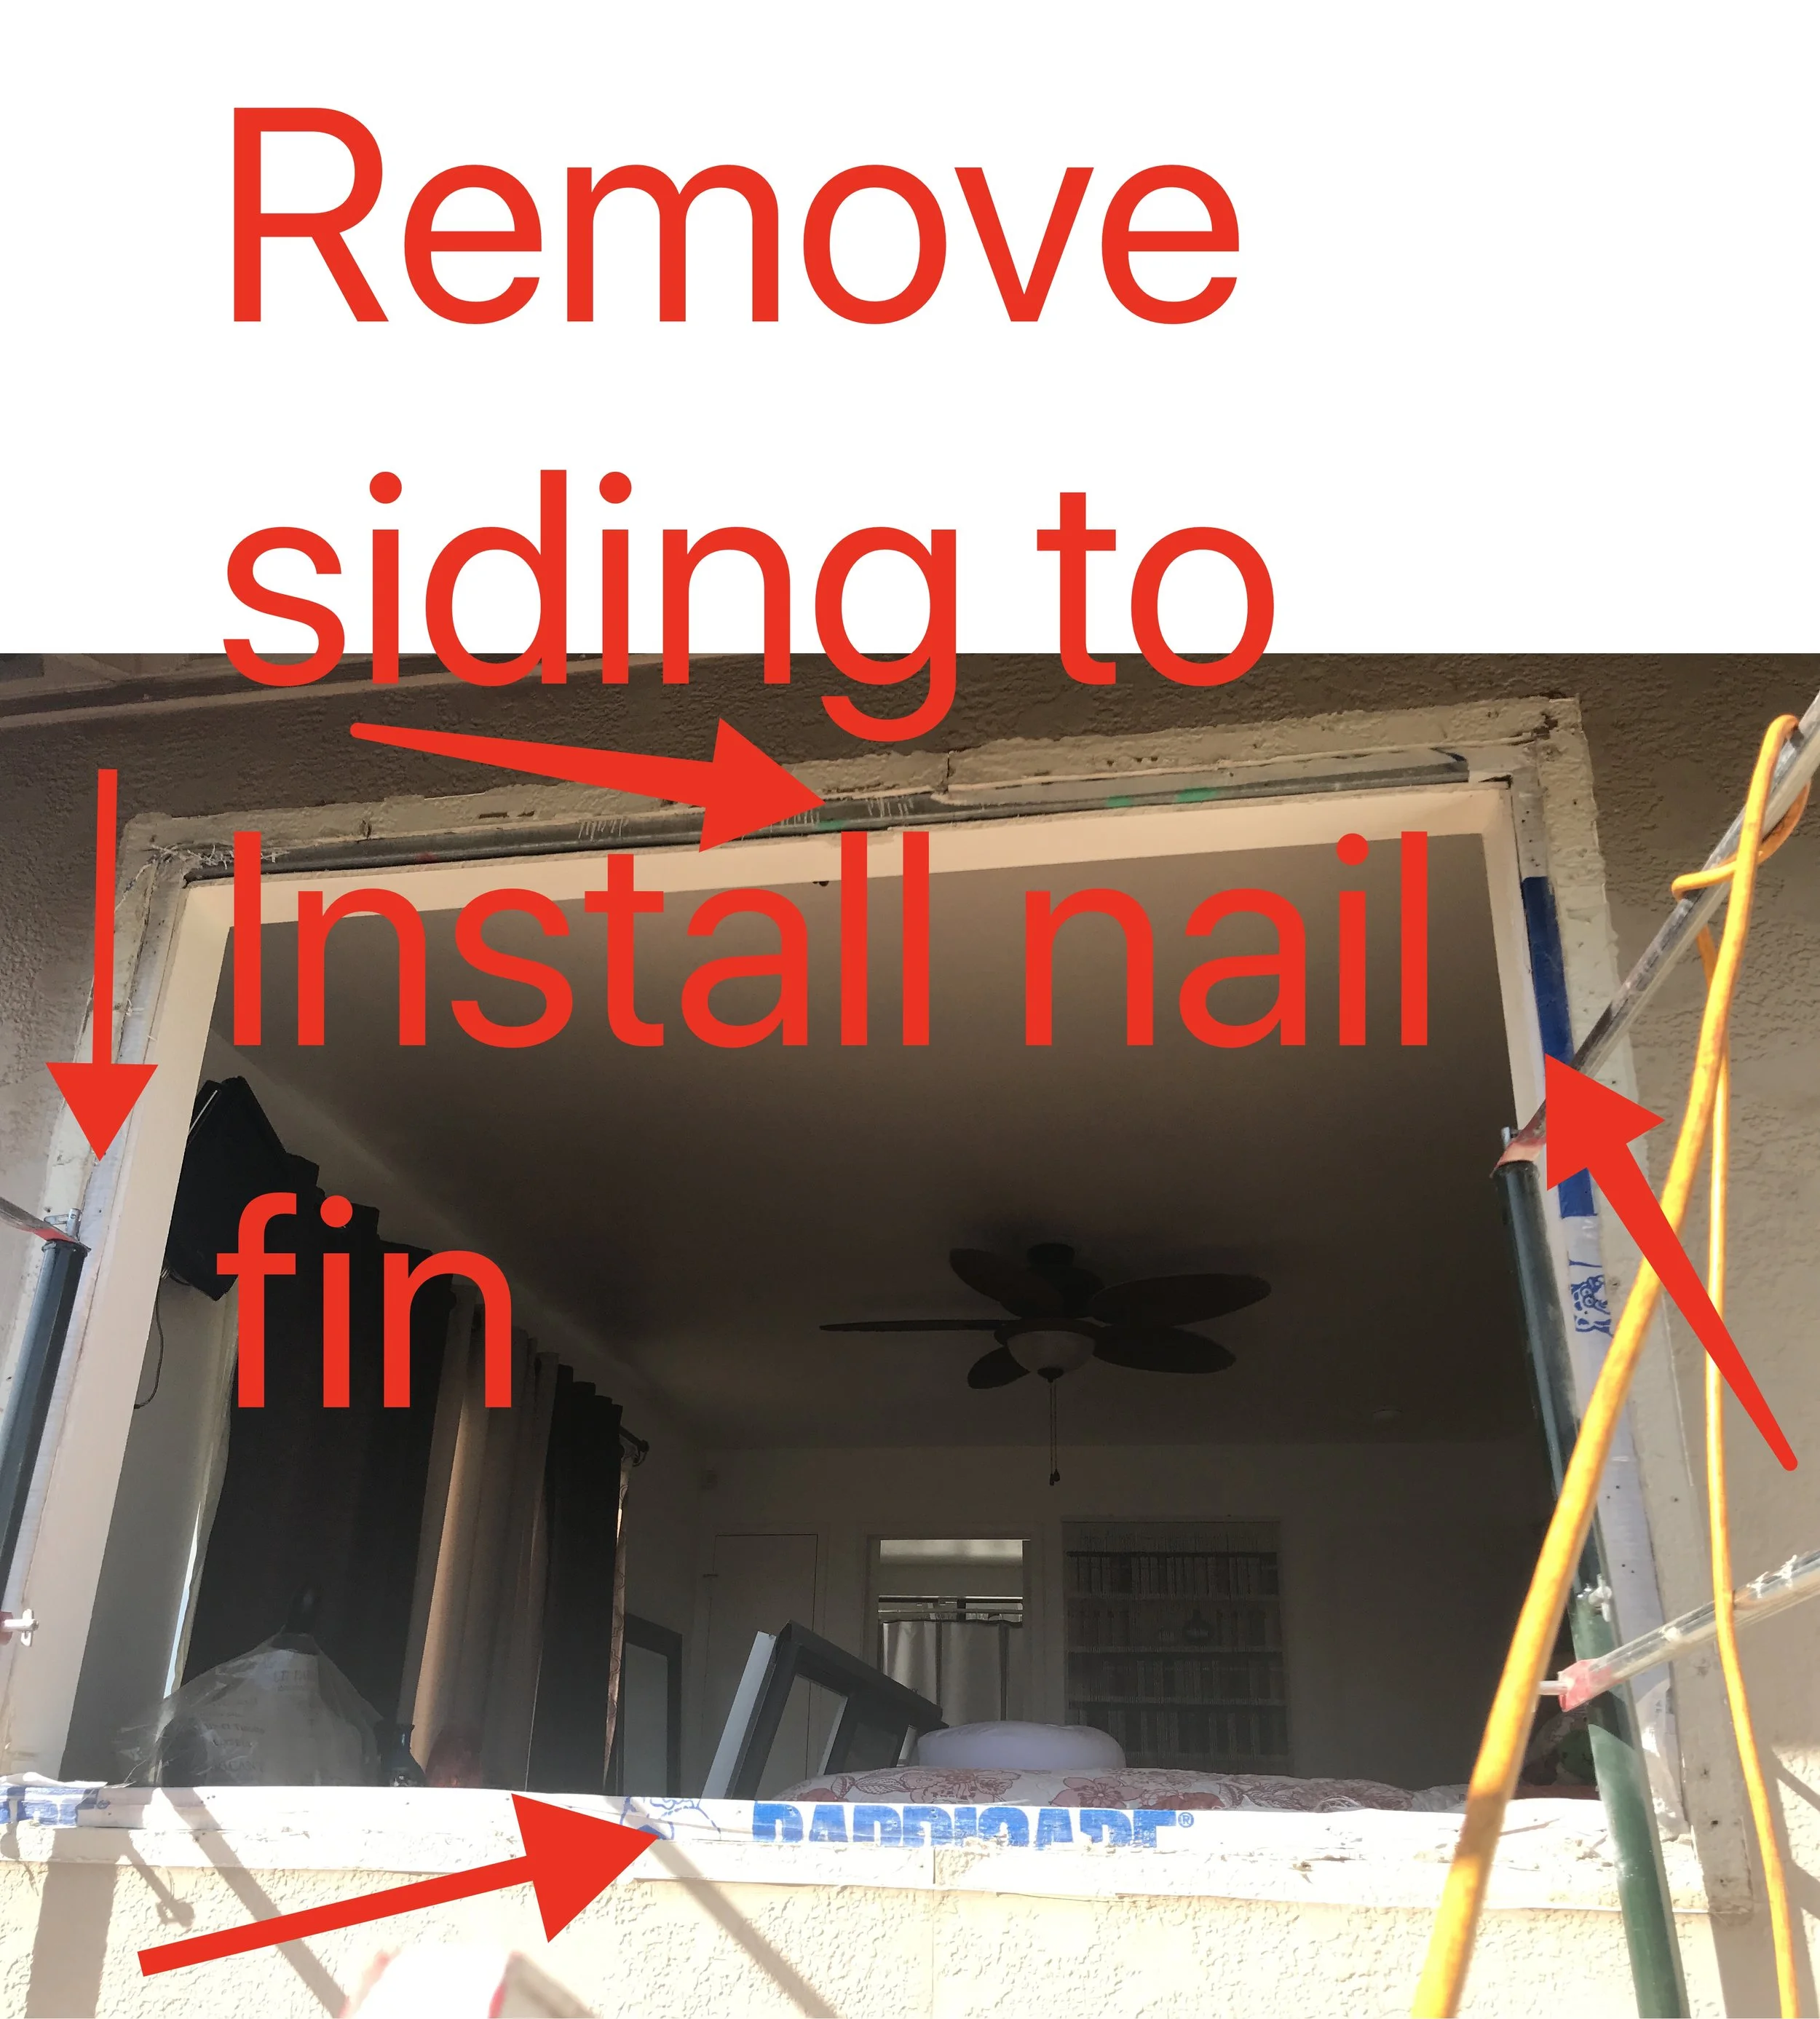
Remove Existing Window

Modification
The windows for this Customer was manufactured smaller at the width and height than was ordered.
Instead of waiting another 6-8 weeks for the correct size windows to come in, the Customer requested of us to have all window openings modified to use these incorrect windows and continue the project.
For this job, we added a piece of wood (nailer) to all for sides to be able to secure the nail fin. We could have cut off the nail fin and added wood to make his opening smaller, but the Customer liked the idea of having the nail fins for added protection against water leaks.
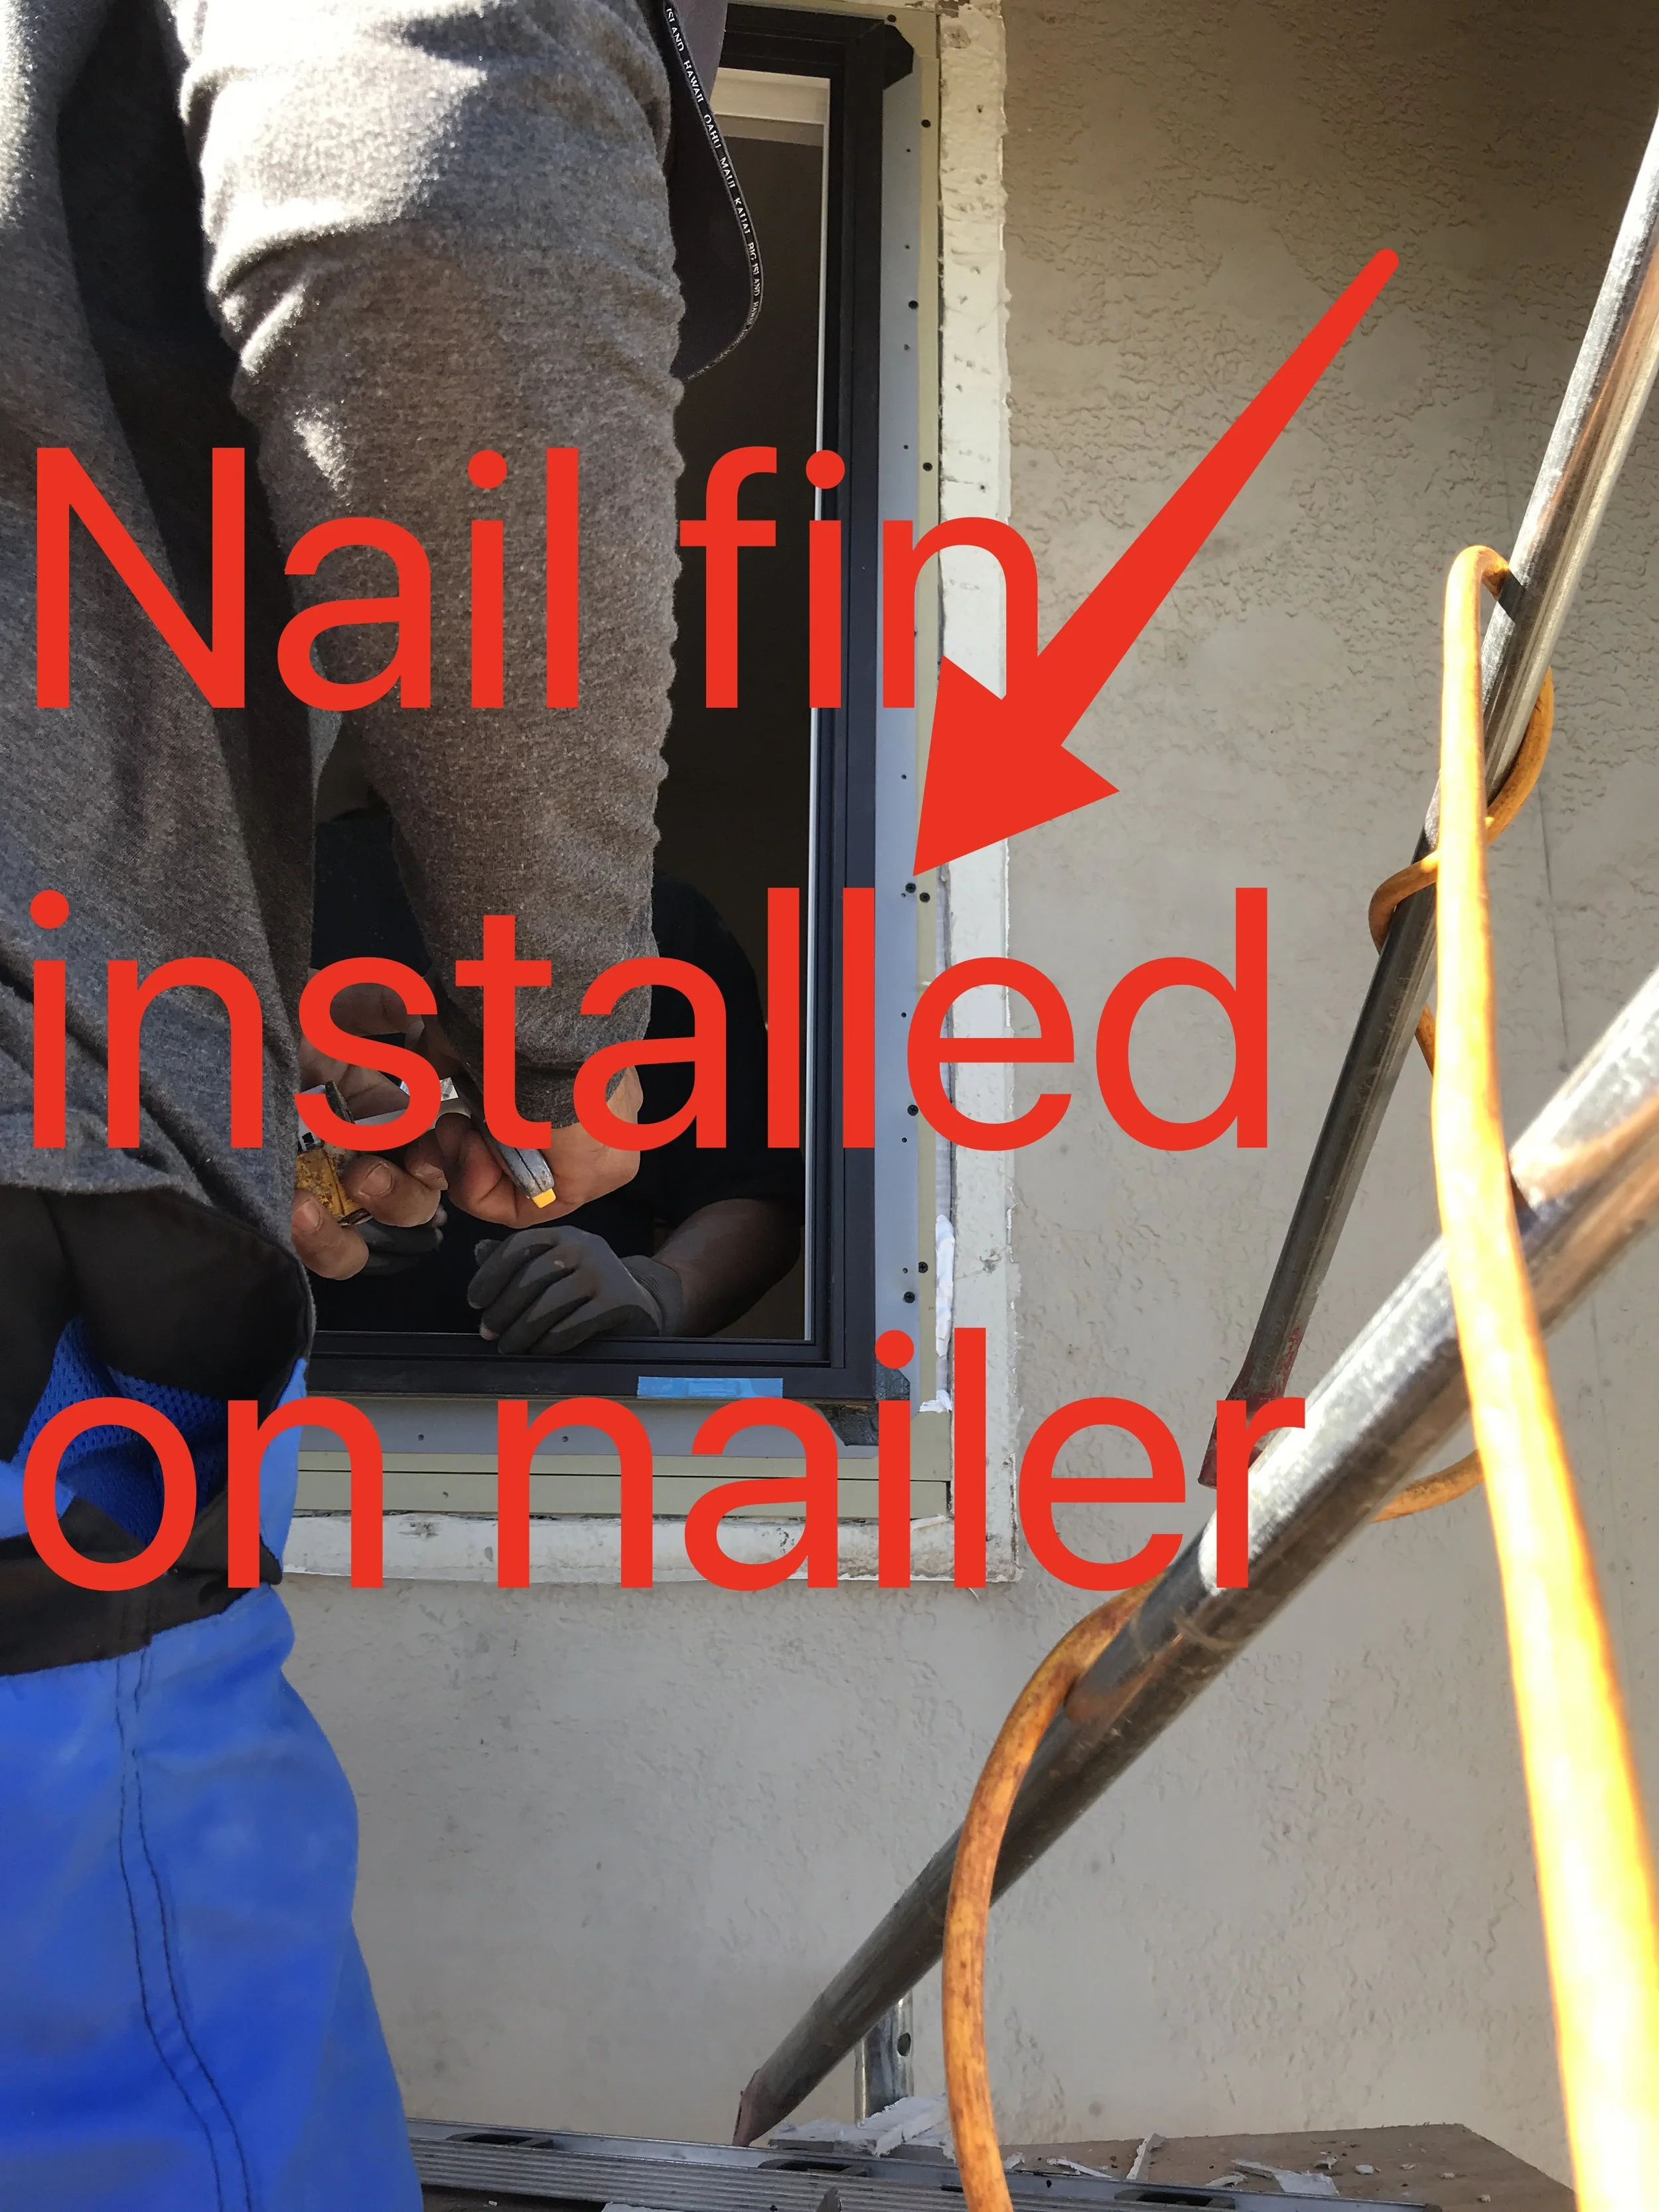
Nail Fin
The nail fin secured to the wood we added, as seen in the previous photo.

Flashing Tape Aids in Prevention of Water Leaks
We add vinyl flashing tape to seal around the window, lapping the top piece over the sides, and the sides over the bottom.
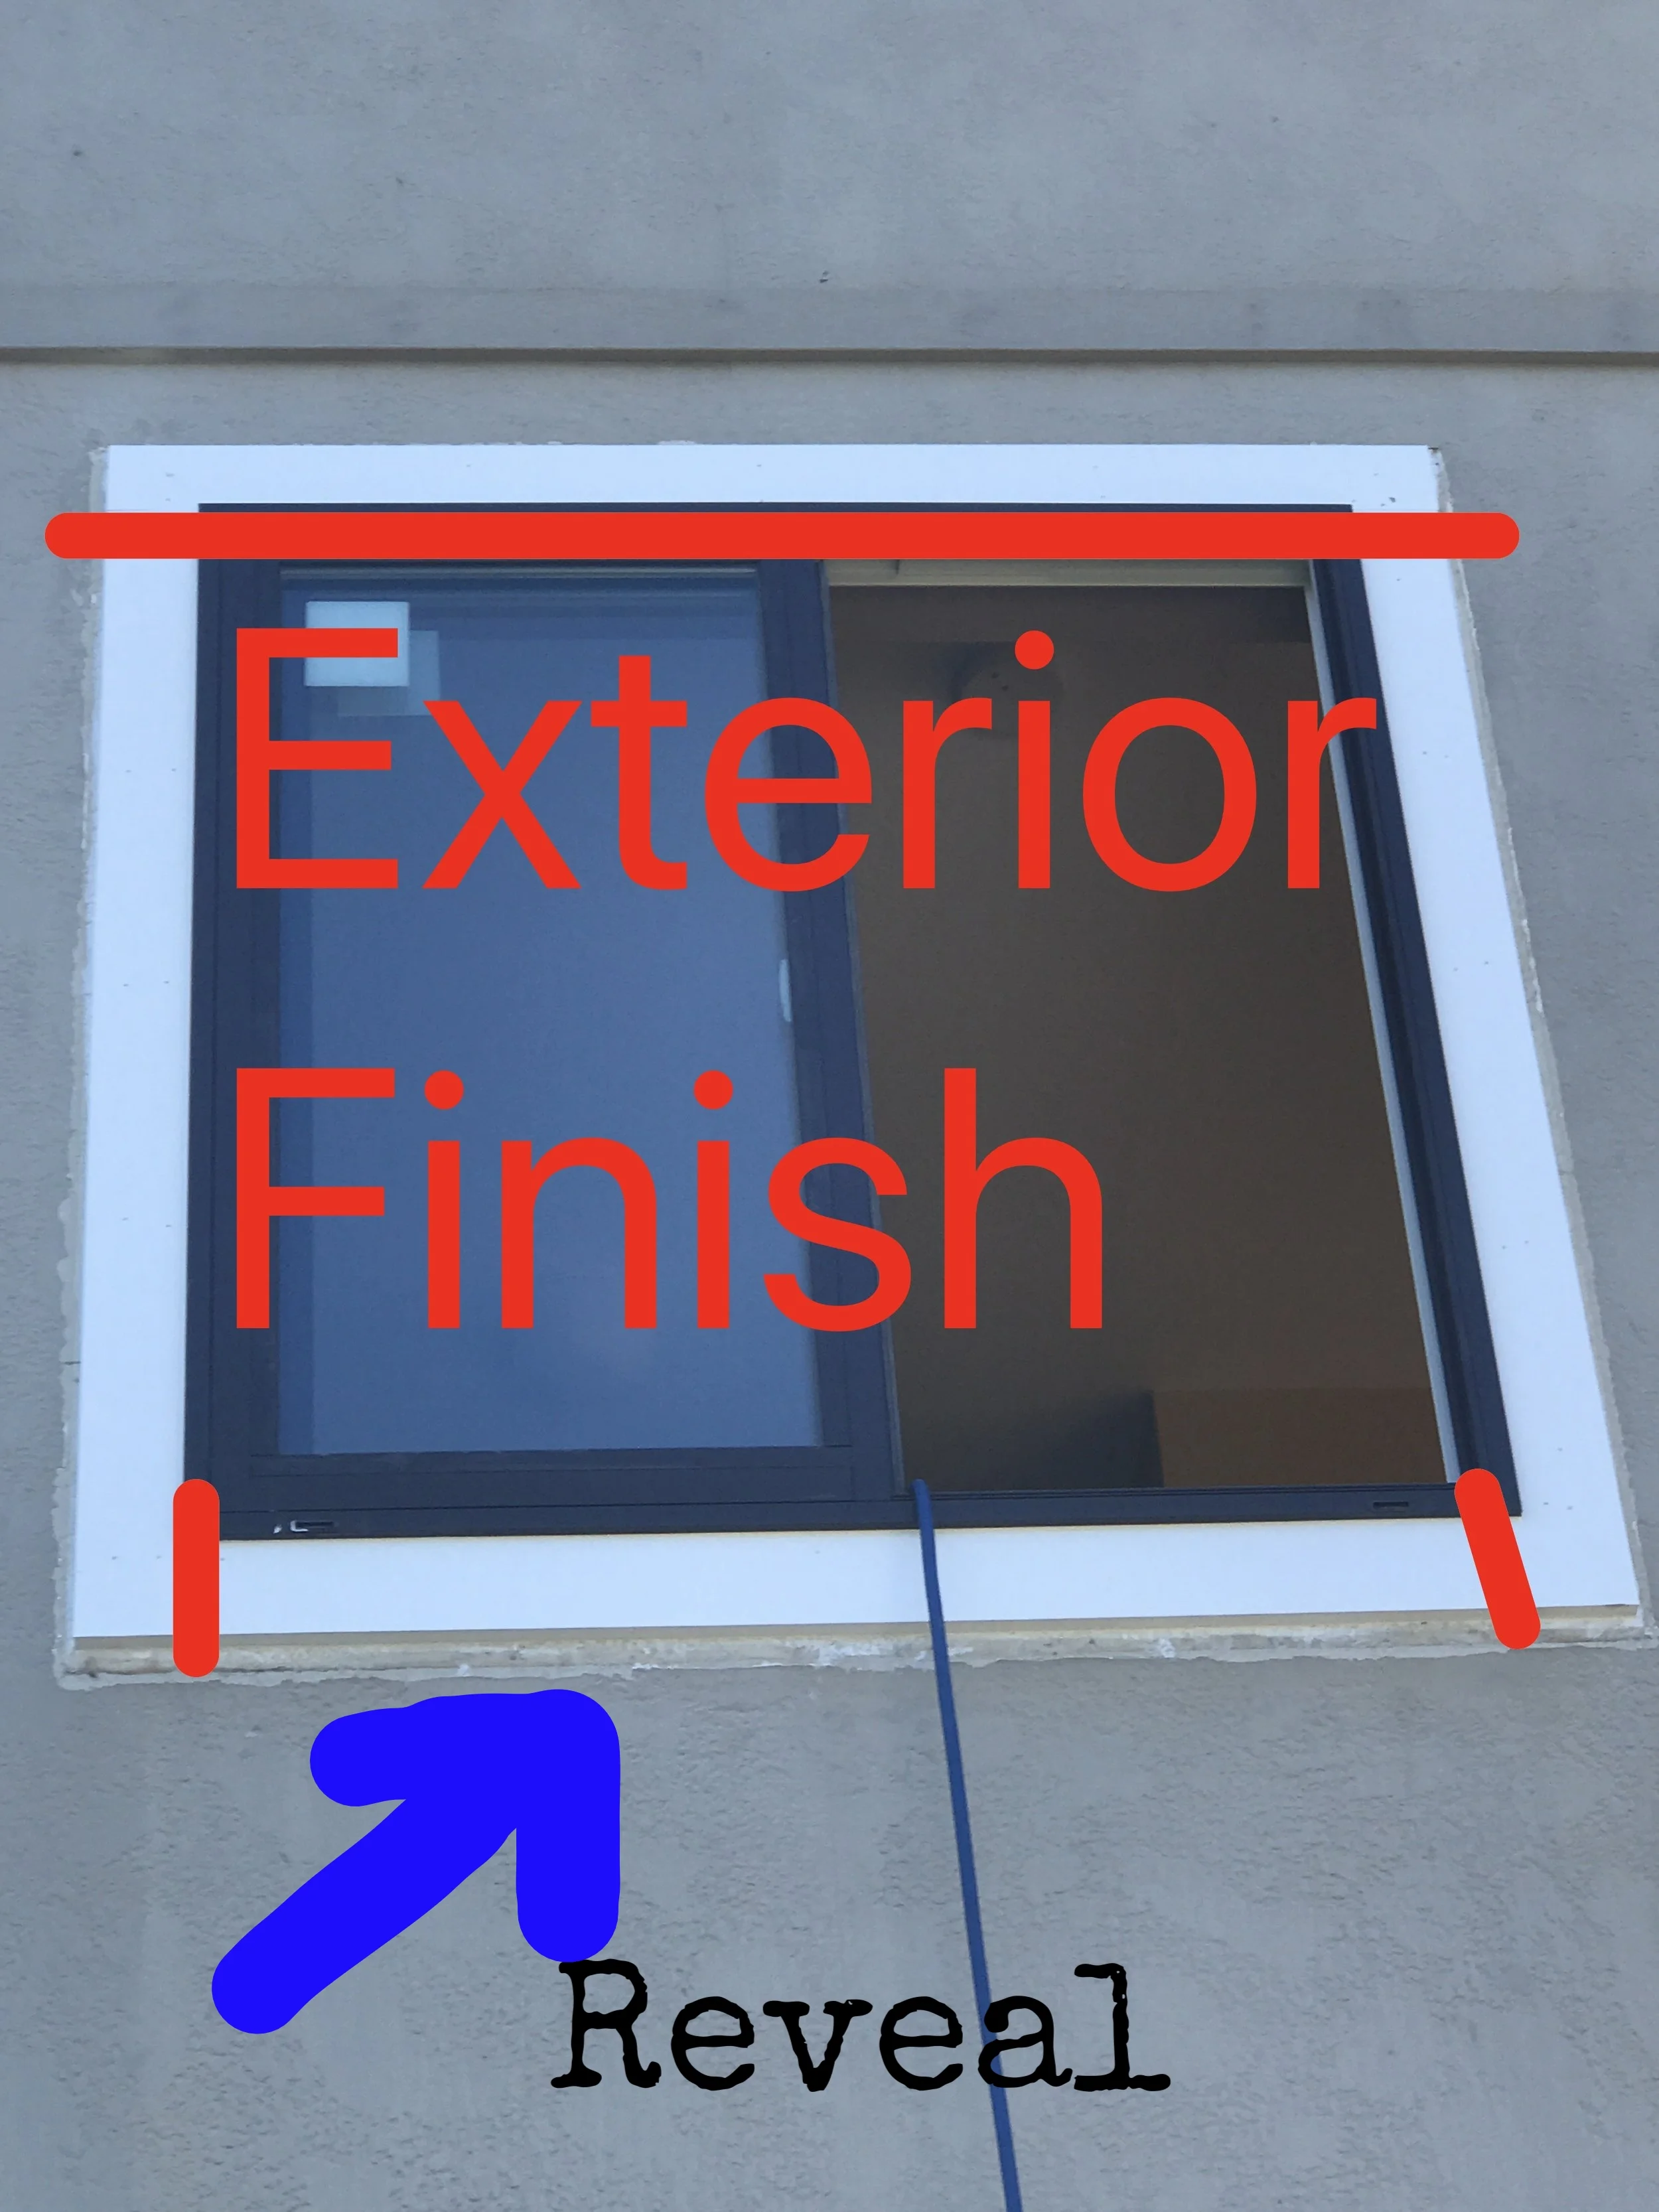
The "Reveal" and Trim Method
WHAT CAUSES THIS EXPOSED AREA/REVEAL AT THE SIDING SURROUNDING THE NEW WINDOW?
Simply put, the trims move inwards, and exposes areas of the siding around the windows that once was covered by the old trims.
But here's our detailed explanation...
OLD WINDOWS INSTALLED AT A DIFFERENT LOCATION AND HAVE SHALLOWER DEPTHS
DEPTH: The old windows are 2" or less deep, DIFFERENT LOCATION: and installed behind the exterior of (not between) the drywall, therefore the old windows are wider at both the width and height of the actual drywall opening.
CURRENT WINDOW DEPTHS: The new standard window depths are 3-1/4" - 4-9/16". Shallower depths are no longer being manufactured; part of the reason is due to the energy efficiency requirements.
Therefore, it is not feasible to install 3-1/4" to 4-9/16" deep windows where a 2" deep window was once present.
NEW INSTALL LOCATION: We measure new windows to fit between the drywall opening, hence shorter windows at the width and height by approximately 1" than the old windows...
THE TRIMS MOVE INWARDS HENCE THE "REVEAL"
SEE PHOTO: If you look closely at this photo, this reveal is evident at the bottom of the trim; although barely seen, this reveal is present at all four sides.
PAINTING: Once this reveal is touched up with paint, and the paint dries, the reveal can barely be seen, and will eventually blend over time.
OUR TRIM INSTALLATION METHOD REQUIRES ASSOCIATION APPROVAL: This method of installing trims: top overlaps both uprights (left and right), and the bottom is sandwiched between the bottom portion of the uprights; also aids in the prevention of water infiltration. But this will not match the other units in your complex, and will require Association approval.

Reveal
Freshly painted
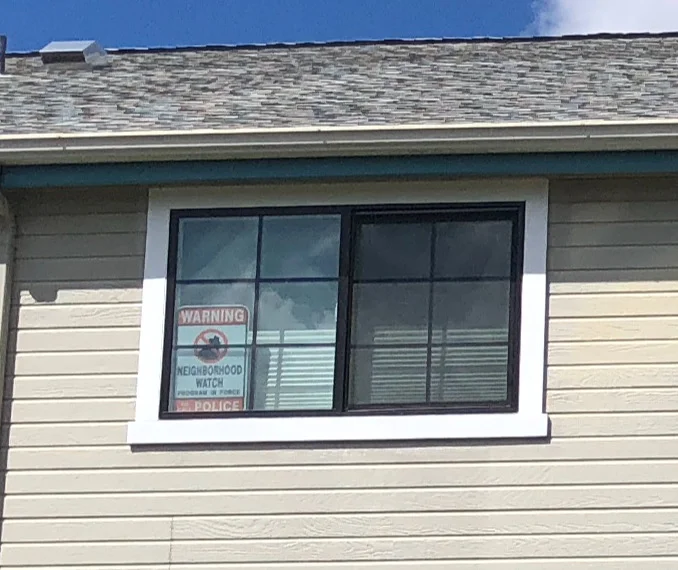
5 Months Later
Reveal - paint dryed